Showing posts with label programming. Show all posts

Sunday, June 2, 2019

List Table Fields

I recently needed a way to list all the table fields from an Access database project, so I could export it into Excel and format it for the user's review (just to make sure I covered all the user's requirements). Unfortunately, all I found, looking around for a utility to do it, was a way to print a report showing all the fields. Unless I simply miissed it, I couldn't find one that exports it to Excel for further consumption. So, I decided to create this demo.

This demo is similar to my other "list" demos where you get to browse for the database file and clicking a button will populate a temporary table with all the information gathered from the selected database. You can then export the table's data into Excel, as desired. The only difference with this new version is that it should be able to handle a password-protected file. If the selected file is password protected, the user is presented with a prompt to enter the password.

To download this demo, please click on the image below. As usual, if you have any comments or suggestions for improvements or found any bugs with this demo, please do not hesitate to let me know. I would really appreciate it.

(click on the above image to download the demo file)

Thank you for reading!

Monday, June 18, 2018

Retrieve Database (Extended) Properties

If you've ever wondered how to programmatically retrieve the information from the Summary tab when you click on "View and edit database properties" from the Info tab in Backstage View, then continue reading.

An example of the Summary tab information is shown in the image below.


If you try to loop through the CurrentDb.Properties collection, these particular properties are not present. For this reason, I consider them to be as "extended" database properties. To retrieve these extended properties, we can use a DAO object.

Here's an example code for specifically retrieving the extended properties found in the Summary tab.


Public Function GetSummaryInfo() As String
'6/10/2018
'thedbguy@gmail.com

Dim db As DAO.Database
Dim dbContainer As DAO.Container
Dim dbDocument As DAO.Document
Dim dbProperty As DAO.Property

Set db = CurrentDb()
Set dbContainer = db.Containers("Databases")
Set dbDocument = dbContainer("SummaryInfo")

For Each dbProperty In dbDocument.Properties
    Debug.Print dbProperty.Name & ": " & dbProperty.Value
Next

'cleanup
Set dbDocument = Nothing
Set dbContainer = Nothing
Set db = Nothing

End Function

The above technique can also be applied to retrieve some of the extended properties found in the other tabs (like Contents, for example). To see a demo file using this technique to examine the database properties for any Access database file, click the image below.

https://www.accessmvp.com/thedbguy/demos/getdbprops.php
click on the above image to download the demo

I hope you find this article useful. Please let me know if you find any bugs in the demo.

Sunday, November 27, 2016

Form Data Validation

If you ever need to make sure the user entered valid information on the form before committing the data into the table, then it is considered "best practice" to perform data validation routines using the Form's BeforeUpdate event. In addition, it is common practice to use the Tag property of form controls to indicate which data needs to be validated.

For example, let us say you have a form for a loan application and a complete section must be filled out for a co-borrower information when the customer is applying for a joint loan. Using the Tag property approach, you can enter "co-borrower" in the Tag property of each Textbox representing co-borrower information and then use the following code in the Form's BeforeUpdate event:


If Me.LoanType = "joint" Then
   For Each ctl In Me.Controls
      If ctl.Tag = "co-borrower" Then
         If IsNull(ctl.Value) Then
            Cancel = True
            MsgBox "Please complete co-borrower information.", vbInformation, "Required"
            Exit For
         End If
      End If
   Next
End If


As already mentioned, this approach is common practice and usually applies to probably 99% of situations for data validations. However, someone approached me recently and said this approach of using the Tag property and looping through all the form controls made his form ran very slowly. It turns out his form was very busy with multiple subforms and a lot of unbound controls updated using code to reflect specific information about the current record from other tables in the database.

So, in this case, we want to avoid looping through all form controls, which is a requirement when using the Tag property approach. To do so, we'll need to know the names of the controls to evaluate, so we can simply validate them. One of the main advantages of using the Tag property is it is very easy to add or remove controls to validate without needing to modify the code. If we hard code the names of the controls to validate, we'll need to modify the code each time our requirements change.

As an alternative, we need to somehow store the names of the controls to validate and then go through each of them to check the form's data. There are several options to accomplish this task. For example, we can use a hidden unbound Textbox to store a comma-delimited value of control names to validate, We can then use the Split() function to store the control names in an array for validation.

The approach I will demonstrate will use a hidden unbound Listbox to store the control names. I like using a Listbox because it is very easy to loop through each item in a Listbox when performing our data validation. For this approach, I recommend using a Value List for a Row Source, although using a table will work just fine as well. Assuming the Bound Column of the Listbox is set to the column with the names of the control, here's a modified version of the above code using a Listbox rather than the Tag property:

If Me.LoanType = "joint" Then
   For lngItem = 0 To Me.ListboxName.ListCount - 1
      If IsNull(Me.Controls(Me.ListboxName.ItemData(lngItem))) Then
         Cancel = True
         MsgBox "Please complete co-borrower information.", vbInformation, "Required"
         Exit For
      End If
   Next
End If


As you can see, this alternative approach accomplishes the same task as using the Tag property without affecting the speed of a very busy form. Adding or removing controls to validate is also as simple as updating the Listbox without needing to alter the code. This approach can even be expanded by storing all control names in a table along with the name of the form or forms to which the control validation applies. Doing so will allow the same code to validate multiple forms.

Tuesday, June 21, 2016

How to check if ACCDE?

There was a question at MSDN Forums the other day on how to determine if an Access database file was compiled to an ACCDE. I found this question somewhat interesting, because I never had a need to determine whether a database was a true ACCDE file or not.

When I deploy a compiled database, I often rename the file extension to ACCDR to force Access into Runtime Mode. I use the following code to check if the database is running in Runtime Mode and exit the application if it is not.

SysCmd(acSysCmdRuntime)

However, I could not find an equivalent SysCmd constant to check for ACCDE, and I am not sure if there is a property for it as well. So, I came up with the following function, which seems to do the job.

Public Function IsACCDE() As Boolean
On Error GoTo errHandler

Application.VBE.CodePanes(1).Show
IsACCDE = False

errExit:
    Exit Function

errHandler:
    IsACCDE = True
    Resume errExit
    
End Function

I am not sure if it is the best way to perform the ACCDE check, but I just thought I would share it and see if you can tell me if there is a better way. Thank you!

Thursday, February 25, 2016

Hide Datasheet Columns in Split Forms

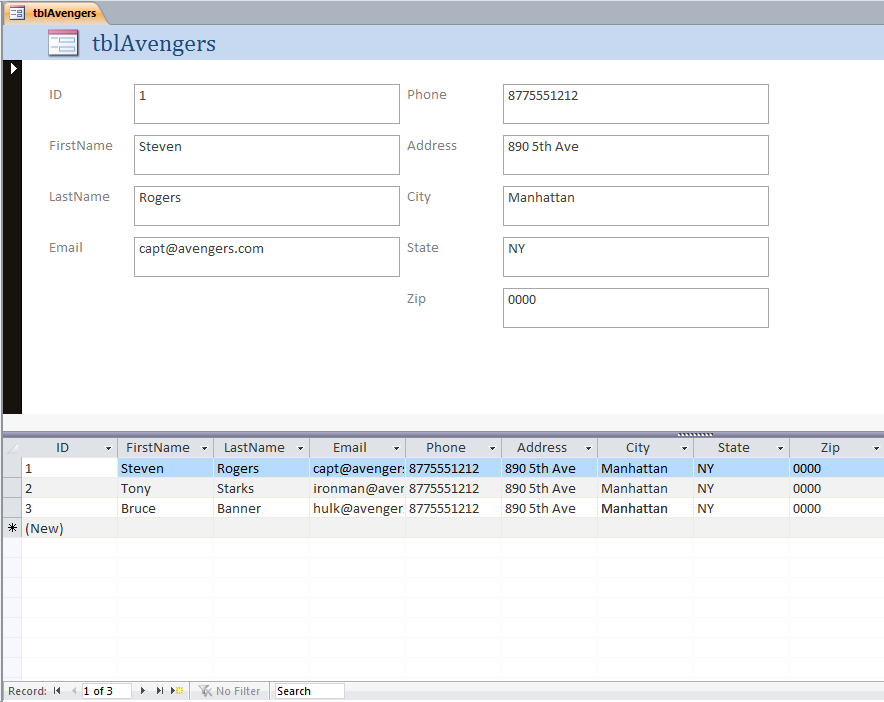
I have heard many complaints about using a Split Form since its introduction in Access 2007. The main purpose of a Split Form is to display the current record in a Single Form View while also displaying the form's record source in a Datasheet View. As the user navigates the records on the form, both the single and datasheet forms will reflect the current record. Figure 1 shows an example of a typical Split Form.


The biggest complaint I've heard about Split Forms is the apparent inability to hide the datasheet columns using VBA.
Before Split Forms, developers had to use a subform in datasheet view and executing either of the following code will easily hide a datasheet column:
Me.SubformContainerName.Form!ColumnName.ColumnWidth = 0
or
Me.SubformContainerName.Form!ColumnName.ColumnHidden = True
However, executing the above codes in a Split Form does not seem to work.

Actually, the above codes can also work on a Split Form, but the change is not reflected immediately. The Split Form must be saved, closed, and reopened before the change can be seen. And in my experiments, simply using Me.ColumnWidth or Me.ColumnHidden seems to work inconsistently depending on certain factors. As such, the above approach is not a very good solution.

Another approach for hiding the datasheet columns is by using the following code:
DoCmd.RunCommand acCmdUnhideColumns
The above command will open the dialog window shown in Figure 2.


To hide a column, uncheck the checkbox; and to unhide a column, check the checkbox. The problem with the above solution is that it requires user interaction. If your application needs a functionality to allow the user to select which columns to hide, then this approach will be appropriate for you. But if you don't want the user to have to choose which columns to hide, then you need a solution like the ColumnWidth or ColumnHidden approach above but with the ability to immediately reflect the changes. Luckily, that is still possible using VBA code.

The trick is to approach the problem from a different angle. We know that simply referring to the Split Form using Me.ColumnWidth or Me.ColumnHidden does not always work, but the datasheet object on the Split Form is also accessible through the Screen object. Therefore, to hide a column in a Split Form, all we need to do is execute the following code:
Screen.ActiveDatasheet.ColumnName.ColumnHidden = True
And voila! The above code should allow you to hide any column in the Datasheet View of the Split Form.

Caveat: Please remember that the topic of this article is focused on hiding a column in the datasheet portion of the Split Form. Thus, none of the above code affects the Textbox control on the Single View Form. If you also want to hide the corresponding control on the Single View Form when you hide its matching column in the Datasheet View Form, then you can still use its Visible property. However, hiding controls on the Single View Form will not automatically rearrange the other controls to take its place like it does in the Datasheet Form. If you want the other controls to take the place of the hidden control, that's another story.

Cheers!

Original post date: September 19, 2015

Extract Email Address

This topic is really about Regular Expressions. If you do not know, Regular Expressions are text strings used as a search pattern for matching  a group of characters within a larger string. You might think of them as "wildcard" characters. However, they can do more than just match characters in a string because you can embed "rules" within the search pattern that the search engine will use to evaluate a match.

For example, if you use a wildcard character in an Access query, you might use something like this:
WHERE LastName Like "a*"
In this example, the "*" is a wildcard character that tells the database engine to match all records with last names beginning with the letter "a." But what if you wanted to return all records with last names that begin with the letter "a" or the letter "b?" You might use something like this:
WHERE LastName Like "a*" OR LastName Like "b*"
So far, so good. But what if you wanted all records with last names that begin with the letters "a" through "g?" You would have a very long WHERE clause if you continue with the above syntax.

Enter Regular Expressions

So, to help with that kind of situation, Access allows us to use limited forms of regular expressions in queries. For example, to return records with last names that begin with the letters "a" through "g," we can use the following criteria:
WHERE LastName Like "[a-g]*"
Much simpler, right? However, like I said earlier, the Access' database engine only gives us limited regular expression capabilities. To take full advantage of regular expressions, we'll need to use VBA and an external regular expression engine. Fortunately, there is a library that is available to us as a reference called "Microsoft VBScript Regular Expressions x.x"
To show how powerful regular expressions are, the following code example shows how it can be used to extract an email address from a Memo field. I used this example as a response to a question in the MSDN forums. The user wanted a way to extract the email address from a Memo field that contains data similar to the following:
Lastname: Doe
Firstname: John
Email address: john.doe@acme.com
Company: Acme Co.
First, a disclaimer: I don't claim to be an expert in regular expressions. In fact, I rarely use them. I just know that if the situation is right, they can be a very powerful tool to use. I would encourage you to learn more about regular expressons to enhance your applications.
Here's a code example that uses a regular expression object to look for an email address within a string.
Public Function ExtractEmailAddress(strData As String) As String
'http://accessmvp.com/thedbguy
'6/19/2015
'Extracts the first email address within a string
'regex email pattern source: http://www.regular-expressions.info/email.html

Dim regEx As Object
Dim regExMatch As Object

Set regEx = CreateObject("VBScript.RegExp")

With regEx
    .IgnoreCase = True
    .Pattern = "\b[0-9A-Z._%+-]+@[0-9A-Z.-]+.[A-Z]{2,4}\b"
    Set regExMatch = .Execute(strData)
    If regExMatch.Count > 0 Then
        ExtractEmailAddress = regExMatch(0).Value
    Else
        ExtractEmailAddress = "No email found!"
    End If
End With

Set regEx = Nothing
Set regExMatch = Nothing

End Function
Notes: The above code example uses late binding, and it will only return the first email address found, if any. To see a modified version of the above code that returns all email addresses found as a delimited string, please visit my website.

I hope this short article piques your interest into regular expressions, and perhaps, I will be learning a thing or two from you very soon. Thank you for reading.

Original post date: June 28, 2015

When to use the "Me" keyword

If you're new to VBA developement, you may have wondered what the "Me" keyword stood for. If you have experience with other programming languages, you may be familiar with the use of "this." It's basically the same concept. "Me" refers to the current object (in context). For instance, if you wrote a code behind a form, "Me" would refer to that form. If the code was written behind a report, then "Me" would refer to that report.

As an example, to refer to a control on a form, the code might look something like this:
Me.ControlName
That's basically the same as the following:
Forms!FormName.ControlName
So, the question is then, when should or could you use "Me" in your code?

As I mentioned earlier, "Me" is a shortcut way to refer to the current object. So, if you're code is executing behind a form or report and you want to refer to the controls or properties of that object, you can use "Me" in your code. If, however, your code is executing within a Standard Module, then using "Me" would be inappropriate, i.e. it will not work. If that's the case, you can either pass a form object to your code or use the forms collection syntax (e.g. Forms!FormName) to refer to form controls and properties.

One other very important thing to remember is that "Me" is a VBA-only construct. In other words, you cannot use "Me" in queries or macros. It cannot even be used in the Control Source on forms and reports. For example, using the following as control source in a textbox will result in an error:
=Me![FieldName]
To get around that, Access allows us to use the "Form" keyword. So, to fix the error, the above would have to be written as follows:
=[Form]![FieldName]
Unfortunately, for queries and macros, your only choice is to use absolute referencing using the Forms!FormName syntax.

Original post date: April 30, 2015

Thursday, February 18, 2016

Temporary Database

In an earlier blog, I mentioned about writing an article on how to use a temporary database for manipulating data that does not cause the front end to increase in file size. Unfortunately, I got side-tracked and forgot about it until recently when someone reminded me about what I said and requested that I write the article now. I apologize for the long delay and hope that this article and the attached demo will help clarify what I meant back then.

To recap, it is sometimes unavoidable to use temporary tables as a working space to manipulate the data before it can be consumed to represent its final form. However, doing so results in the size of the database file to increase almost exponentially each time this happens. It then becomes necessary to perform a compact and repair at a regular interval to keep the file size to a minimum and prevent reaching the 2GB limit.

As an alternative, the working data can be moved to a separate and temporary database file, so the size of the front end file will not be affected. That is what this demo file will try to illustrate. Please click on the image below to download the file.


How it works.

The demo contains a table with the data that is required to be manipulated. Instead of creating a temporary table, the demo creates a temporary database in the same folder as the front end file. It then copies the data from the local table into the temporary database. A linked table is then created to establish a connection between the front end and the temporary database. As the linked table is created, a security warning may display. This can be avoided by creating the temporary database in a Trusted Location. When the user closes the database, the temporary database file can be manually deleted. The demo automatically deletes the temporary database file prior to creating a new one.

Please let me know if you have any questions. Thank you.

Original post date: July 31, 2015

Sending out Email using CDO

I know there are a few demos already available showing how to send out an email from Access using SMTP and CDO, but I received a request in the forums recently to simplify ("dumb down") the process. So, to that respect, the following demo just shows the very basics on how to use CDO (Collaboration Data Objects) using one form where all the essential elements for setting up the email object is contained in one subroutine. Click on the image below to go to the download page. Enjoy!


As usual, please let me know if you have any comments or questions. Thank you.

Original post date: December 23, 2014

Assigning Ribbons to Forms and Reports using VBA

I was recently asked to upgrade an Access 2003 database into Access 2010. I thought to myself "that can't be hard," so I went ahead and accepted the challenge. The old database file used a Switchboard, and all the Menu bars were hidden. That's great, so I thought all I had to do was also hide the Ribbon because everything the user needs would be in the Switchboard anyway (I decided not to convert the Switchboard to a Navigation Form because I didn't want to deal with new problems).

So, I moved all the objects from the old database into a brand new ACCDB file and removed all references to any ActiveX objects. Once I debugged out all the errors, I gave the new application to the client. Then, I realized that one thing I forgot to do was provide a Ribbon for the reports (remember, I had hidden the Ribbon for the whole application). I guess I could just "unhide" the Ribbon when a report is opened, but I thought I would give the client a taste of the new Access 2010 features and create a custom Ribbon for the reports.

Now, there were quite a few existing reports in this database, and it would take me some time to assign the new custom Ribbon to these reports. So, I decided I would just create a function to do the assignment for me. The following is what I came up with:
Public Sub AssignReportRibbon()
'accessmvp.com/thedbguy
'7/18/2014

Dim rpt As Variant

For Each rpt In CurrentProject.AllReports
    DoCmd.OpenReport rpt.Name, acViewDesign
    rpt.RibbonName = "RPTReport"
    DoCmd.Close acReport, rpt.Name, acSaveYes
Next

End Sub
However, it didn't work because I kept getting an error on this line:
rpt.RibbonName = "RPTReport"
I couldn't understand it, so I Googled around for an answer. Luckily, I discovered that fellow MVP, Daniel, had already figured it out. Check out his blog post here. So, based on his discovery, I modified my code to the following:
Public Sub AssignReportRibbon()
'accessmvp.com/thedbguy
'7/18/2014

Dim rpt As Variant

For Each rpt In CurrentProject.AllReports
    DoCmd.OpenReport rpt.Name, acViewDesign
    Reports(rpt.Name).Report.RibbonName = "RPTReport"
    DoCmd.Close acReport, rpt.Name, acSaveYes
Next

End Sub
And voila, it now works! It can't be that hard to convert that code to use it for Forms, but I'll leave that challenge for you.
Please let me know if you have any questions. Thanks, as always, for reading.

Cheers!

Original post date: July 30, 2014

Requested type library or wizard is not a VBA project

Do you use Navigation Forms in your database projects and have seen this error message?


If so, please read on to hear about my experience running into this issue and learn what I had to do to fix the problem.

After avoiding to use Navigation Forms since it's introduction with Access 2010, I recently found myself without any choice because our IT department decided to disable all custom ribbons on our network for security reasons. Please don't get me wrong, I personally don't think there's anything particularly wrong with Navigation Forms. On the contrary, I think they are a huge improvement over the old Switchboard, but I never used the Switchboard much either (only on occasions). So, when the custom ribbons came out in Access 2007, I thought it was a better use of space for a menuing system and decided to design all my user interface using custom ribbons. However, when our IT system was recently upgraded to Office 2010, my Access 2007 custom ribbons stopped working because of our new network security configuration. So, I decided to give Navigation Forms a try.

There may be other instances where the subject error message can occur, but I ran into it when I decided to use a Navigation Form with 2-Level Horizontal Tabs.


Now, please note that just by creating a Navigation Form with 2-Level Horizontal Tabs won't necessarily produce the error mentioned above. Instead, this problem may only reveal itself when you compile your project into a ACCDE file. In other words, you might not realize that there's a problem while testing your project using the full version of Access until you deploy a compiled version or your database application to your users.

What is causing this?

Interestingly enough, some people may not even run into this issue at all. What causes this problem is when you are using any VBA code behind your Navigation Form. For example, you'll run into this problem if you have a Load Event procedure to hide certain tabs depending on the user's security level or if you have an Open Event procedure to change the label captions on your Navigation Form. Unfortunately, just deleting all the codes will not be enough. The mere fact that you have the "Has Module" property set to "Yes" will also cause this problem.


So, how do I fix it?

Of course, the easy answer is to just set that property to "No." And when you do that, Access will give you this warning, which you'll need to pay close attention to:


As you can see from the bolded part of that warning message, setting the Has Module property to No will "delete" all the VBA code you have behind that form. So, if you have any code behind the form, I suggest that you save them outside of the form for future reference before you change this setting.

If you *must* have some code run behind your Navigation Form, I recommend that you use Macros instead. You can take all the VBA procedures you removed from the form and convert them into macros to be used in your Navigation Form. Using macros to execute your form logic will not produce the error that using VBA procedures does. Unfortunately, there is no utility to convert VBA into macros, so you'll have to do that process manually.

Like I said earlier, I am not sure what other situations could result in this error, but I hope the solution presented here will somehow help fix those problems as well.

Original post date: May 27, 2014

How to build strings in VBA

I promised a member at UtterAcess that I will write a blog about how to build a string in VBA, particularly when constructing a SQL statement, so here goes...

Delimiters

Before we start building a string in code, I think it's important to understand the concept of "delimiters" first. When you declare a String variable in VBA, the value you assign to it must be delimited with a double-quote character. For example:
strVariableName = "Some String Value"
That should be easy enough to understand, but the problem comes when building a string while concatenating field values into the string as well. Table fields have different data types and some data types need a specific delimiter when using them in code. The most common data types and their corresponding delimiters are as follows:

Data TypeDelimiter
TextDouble-quote (") or Single-quote (')
Date/TimeOctothorpe (#)

Here are some examples of their uses:
rs!CompanyName = "UtterAccess"

rs!CompanyName = 'UtterAccess'

rs!VisitDate = #4/29/2014#

rs!VisitTime = #10:30 AM#
As you can probably imagine, the problem we will try to tackle in this article is in how to build the string with Text data types within it since both String variables and Text data types use the same delimiters that usually causes some confusion during coding.

Building the string one step at a time

We are going to discuss an approach that was presented by another UtterAccess member when tackling this issue. First, let's look at the final version of the string we're trying to build. The goal will be to write code that will result in a string value that looks like this:
INSERT INTO tblCustomers (CustLastName, CustFirstName, CustNo, DOB)
VALUES ("O'Hara", "Scarlett", 1936, #4/28/1861#)
In our code, we will assume that each value to be inserted into the table are held in variables called strCustLastName, strCustFirstName, lngCustNo, and dteDOB. We will then insert these variables in their proper places to replace the hard values we used above.  Let's get started:

Step 1 - Naturally, the first thing to do is to delimit the whole value because it is a string, so let's add a double-quote at the beginning and at the end of our string:
"INSERT INTO tblCustomers (CustLastName, CustFirstName, CustNo, DOB)
VALUES ("O'Hara", "Scarlett", 1936, #4/28/1861#)"
Step 2 - Next, we will replace the  hard values with the variables that represent each hard value:
"INSERT INTO tblCustomers (CustLastName, CustFirstName, CustNo, DOB)
VALUES (strCustLastName, strCustFirstName, lngCustNo, dteDOB)"
Step 3 - Now, the variables must be concatenated into the string so that VBA will then replace them with the values they represent when the code executes:
"INSERT INTO tblCustomers (CustLastName, CustFirstName, CustNo, DOB)
VALUES (" & strCustLastName & "," & strCustFirstName & ","
& lngCustNo & "," & dteDOB & ")"
Notice how we enclosed each segment of the concatenation with the double-quote delimiters because we are now trying to combine multiple strings together.

Step 4 - At this point, we'll need to add the proper delimiters for each data type for our variables. Remember that strCustLastName and strCustFirstName variables are for the CustLastName and CustFirstName fields respectively, which are Text fields and therefore need a double or a single quote for its delimiters. The lngCustNo variable represents the value for the CustNo field, which is a Number data type and therefore does not need any delimiter. And, the dteDOB variable is for a Date/Time field, which requires the octothorpe (hash mark):
"INSERT INTO tblCustomers (CustLastName, CustFirstName, CustNo, DOB)
VALUES (""" & strCustLastName & """,""" & strCustFirstName & ""","
& lngCustNo & ",#" & dteDOB & "#)"
Notice how we actually used two double-quotes to delimit the Text data types (strCustLastName and strCustFirstName)? Now would be a good time to discuss some possible issues with Text data types when concatenating them into string values. If the hard values we expect will never contain a single-quote within it, then we could have just use a single-quote as delimiters and be done with it. However, remember that for our example, the strCustLastName variable actually represents the hard value "O'Hara." So, using a single-quote to delimit that variable will fail because the hard value also contains a single-quote. So to avoid that problem, we need to use a double-quote as a delimieter. But why use two of them? Well, if we used just one double-quote, then VBA will interpret it as the delimiter for our string (the whole thing that we're building) instead of just for the variable. So, we used two double-quotes to tell VBA to replace it with one double-quote when it interprets the code during execution.

Step 5 - Actually, that's it. We're done! There's no Step 5. However, one last item that I need to point out is that I didn't use any "continuation" character in the above code examples to reduce any confusion while learning the basic concept of building the string in code. So, the above code samples should be considered as one long line even if they were displayed as multiple lines above. If you wanted to break them down into multiple lines in your code using the continuation character, it might look something like this:
strSQL = "INSERT INTO tblCustomers (CustLastName, CustFirstName, " _
               & " CustNo, DOB) VALUES (""" & strCustLastName _
               & """,""" & strCustFirstName & """," & lngCustNo _
               & ",#" & dteDOB & "#)"
If you want to see the UtterAccess thread that inspired this article, click here. As usual, thanks for reading, and I would appreciate any comments or feedbacks.

Original post date: April 28, 2014

Friday, February 12, 2016

Google Maps API

I know that there are already plenty of demos available on the Internet for using Google Maps in an Access database, so what could be different with this one? Well, most of the Google Maps demo I've seen involve using the web browser control to display the map in an HTML page that uses Google Maps API through JavaScript. That's because most Google Maps implementation in Access require a dynamic map.

But when a recent project required me to incorporate Google Maps on a report for printing, I found out that the usual approach of using a web browser control will not work. As a result, I had to search for an alternate solution. To see what I have discovered, click on the image below.


As usual, any comment is welcome and appreciated.

Original post date: January 13, 2014

Fillable PDF API Demo

In response to requests from some of you who have seen my original Fillable PDF Demo at UtterAccess, I have decided to post an Acrobat API version to show the difference between this approach as compared to using the XFDF method.

Please remember that this method is only useful if you have the full version of Adobe Acrobat installed on your machine. One advantage of this method is that you are able to save the filled out form as a PDF file.


Please let me know if you have any questions.

Original post date: December 25, 2013

Pop-up, Modal, or Dialog Forms

This article is an excerpt, reprinted with permission, from the book "Professional Access 2013 Programming."

Pop-up, Modal, or Dialog Forms

Access forms can be opened within your application in three different window modes: Popup, Modal, or Dialog. These can be set manually using the property sheet or programmatically using VBA or macros. Each mode behaves differently and can be used for different purposes. You can also combine the modes to have even greater control over the way the user can interact with the form and the entire application when the form is open.

Pop-up

A pop-up form opens and stays on top of all other open forms within your application (actually, the pop-up form opens outside of the Access application window). Although it is on top of other objects, the pop-up form does not necessarily have to have the focus. This can be quite helpful when you want to present the user with some reference information that needs to be available while they are using or entering data on another form. A pop-up form also allows the user to access the ribbon buttons and menus.

You can create a pop-up form by setting its PopUp property to Yes. This property is often used in conjunction with setting other properties such as Modal, Cycle (of records) and Border Style.

Modal

A modal form opens and keeps the focus until it is closed (or hidden). When a modal form opens, the user will not be able to use other forms or even go to the ribbon (it won’t even let you click the Exit button to quit Access). This mode is useful when you want to control the user’s workflow by opening each modal form in sequence based on the task they’re doing.

You can create a modal form by setting the form’s Modal property to Yes. If you use both the PopUp and Modal properties, you can make the form behave both as a pop-up (stays on top) and a modal (keeps the focus) form by setting them both to Yes.

Dialog

A dialog form opens on top of all the other forms and also keeps the focus until it is closed (or hidden). There is one major difference with a dialog form’s behavior as compared to a form with its PopUp and Modal properties set to Yes. When a form is opened in dialog mode, all code execution is also “suspended” until the dialog form is closed. This type of behavior is very useful when you need user input before proceeding with the next logic in your code. Some examples of dialog forms are the “warning” messages from Access or the MsgBox() and InputBox() functions.

You can only open a form in dialog mode using code (VBA or macro). The form can be opened in dialog mode regardless of the PopUp and Modal property settings. You can use either of the following lines of code to open a form in dialog mode,

DoCmd.OpenForm "FormName", , , , , acDialog
or:
DoCmd.OpenForm "FormName", WindowMode:=acDialog

(The above excerpt can be found in Chapter 17, Page 262 of the book "Professional Access 2013 Programming.")

Original post date: October 2, 2013

Professional Access 2013 Programming


I am very proud to say that I had the privilege to work with the authors Teresa Hennig, Ben Clothier, George Hepworth, and Dagi (Doug) Yudovich on their latest book "Professional Access 2013 Programming as a contributor and technical editor. This book was written by developers for developers. It covers all the new features of Access 2013 including the new "Access App" paradigm as well as plenty of tips for client database development.

The book goes in detail in creating a web application using Access 2013 with Office 365/SharePoint 2013 demonstrating how powerful this new feature could be and proving that Access Apps can be used in real-world business situations. My favorite part of the book is learning the new data types and macro actions in Access 2013. I never had any interest in creating Access 2010 web databases because they were so limited and hard to implement, but the new Access 2013 web application is more powerful and fun to create. The authors wrote the chapters in a manner that was easy to follow - I had a working Access App after reading just the first few chapters.

The book also includes download files and demos that you can immediately implement to enhance your own database projects. I highly recommend this book to any developer. Whether you're involved in creating Access web solutions or not, this book will serve as a good resource and a valuable part of your toolkit.

Click here for more info...

Original post date: September 10, 2013

SimpleCSV()

I know there are already plenty of examples out there on how to concatenate records or child records into a delimited string, but I also see this request often enough in the forums that I wanted to have one place to point them to for a possible solution.

The following is just a simple function most users and developers can add to their database to quickly produce a delimited string of records they would like to combine. I purposely made it simple because all the bells and whistles, such as sorting the list or accepting listboxes as arguments, are already available on other websites, so there's really no need for me to reinvent the wheel for those.

To use this function, just pass a "SELECT" SQL statement and an optional delimiter to it. The power of this simple function is really in the creativity of your SQL statement. Please note there are no error handlers, so you'll have to add your own.

As always, I appreciate any comments you may have. Thank you.

Public Function SimpleCSV(strSQL As String, _
   Optional strDelim As String = ",") As String
'Returns a comma delimited string of all the records
' in the SELECT SQL statement
'Source: http://accessmvp.com/thedbguy
'v1.0 - 8/20/2013

Dim db As DAO.Database
Dim rs As DAO.Recordset
Dim strCSV As String

Set db = CurrentDb()
Set rs = db.OpenRecordset(strSQL, dbOpenSnapshot)

'Concatenate the first (and should be the only one)
' field from the SQL statement
With rs
 Do While Not .EOF
  strCSV = strCSV & strDelim & .Fields(0)
  .MoveNext
 Loop
 .Close
End With

'Remove the leading delimiter and return the result
SimpleCSV = Mid$(strCSV, Len(strDelim) + 1)

Set rs = Nothing
Set db = Nothing

End Function

Original post date: August 21, 2013

What's the opposite of DSum()?

A member recently posted a request in the forums for a function that does the opposite of DSum(). The intent was to have a query with a running total but using subtraction instead of addition. I never heard of anyone needing to do something like this before, so it was no surprise that I couldn't find a built-in function that does the opposite of DSum() or Sum() to offer the member.

I really don't know if anyone would ever need to do this again, but I just thought to share what I came up with in case it may be useful to someone else. The following function is very basic and does not include any error handling. Hopefully, you can modify it to suit your needs. I would happily accept any comments or recommendations to improve this function to better help those who may want to use it.

Public Function DDiff(strField As String, strDomain As String, _
    Optional strCriteria As String) As Variant

'accessmvp.com/thedbguy
'7/26/2013

Dim dbs As DAO.Database
Dim rst As DAO.Recordset
Dim strSQL As String
Dim varDiff As Variant

strSQL = "SELECT [" & strField & "] FROM [" & strDomain & "] "

If strCriteria > "" Then
    strSQL = strSQL & " WHERE " & strCriteria
End If

Set dbs = CurrentDb
Set rst = dbs.OpenRecordset(strSQL, dbOpenSnapshot)

With rst
    If Not (.BOF And .EOF) Then
        varDiff = .Fields(strField)
        .MoveNext
    End If
    Do While Not .EOF
        varDiff = varDiff - .Fields(strField)
        .MoveNext
    Loop
   .Close
End With

DDiff = varDiff

Set rst = Nothing
Set dbs = Nothing

End Function

To see the discussion that started it all, including a pure SQL solution, click here.

Original post date: July 27, 2013

Event-Driven Programming

This topic may seem to come from out-of-nowhere, but I promised a member at UtterAccess that I will elaborate on this subject from our discussions in the forums.

What is Event-Driven Programming?

In a nutshell, event-driven programming (EDP) is a coding methodology where the flow of the program is determined by "events." It is a different approach than procedural programming where the flow of the program is dictated by the steps specified as written in the program and object-oriented programming (OOP) where the flow of the program relies on the interaction between objects and their properties and methods.
Now, it so happens that the majority of Access VBA programming is an example of EDP (it also has some aspects of OOP mixed in), and that's what this topic is all about. I just wanted to describe how Access uses EDP to help understand why we have to do certain things when writing our VBA procedures.

EDP Components

Event-driven programming requires three components:
  1. Event Handler
  2. Event Binding (or Wiring)
  3. Main Loop
Event Handler
The first step in developing an event-driven program is to write a series of subroutines or procedures that will be executed once an event occurs. Some examples of events that can occur in a Graphical User Interface (GUI) application are clicking on a command button, opening a form, and entering data in a textbox. Access allows three types of code as event handlers as seen in figure 1.

Figure 1. Choose Builder

 Access event  handlers can be a macro (saved or embedded), an expression (usually a function call), or a procedure. As with many programming environments, Access also provides an event template when using the Code Builder so that all you have to do is write the code for the event. Here's an example of an event procedure using the template that Access provided:
Private Sub txtDateReported_BeforeUpdate(Cancel As Integer)
   If Me.txtDateReported > Date Then    
      MsgBox "Employee report date cannot be in the future.", _
         vbInformation, "Invalid!"
      Me.txtDateReported.Undo   
      Cancel = True
   End If
End Sub

Event Binding
After writing the code for handling an event in your program, the next step is to bind it to the specific event that the code is supposed to handle. I prefer to call this process as "wiring" the event. The method of wiring an event to its event handler in Access will depend on which code builder you used for creating the event handler. If you didn't use the Code Builder, you can select a name of a Macro from the dropdown in the event property to wire that event to a saved macro. If you used the Macro Builder, the event property that you are wiring (binding) will have "[Embedded Macro]" displayed. If you used the Expression Builder, the complete expression preceded by an equal sign will be displayed. And lastly, if you used the Code Builder, the event property will display "[Event Procedure]."

It is important to note that "wiring" an event is an important step in making sure the program runs as expected. Even if you have written the event handler to do all the necessary tasks when an event occurs, if it is not wired to that event, then the event handler will never be executed. An event in Access is not wired if the event property is empty. Remember, even if an event handler is present in the code module, it will not be called if the event property is blank.

Main Loop
The final piece of the puzzle is called the "main loop" because it's a function that coninually monitors for events and is responsible for calling the appropriate event handler when an event fires. Fortunately for us, Access already provides this function so we don't have to worry about it.

The main point of this article is to explain that you, as the programmer, can write as many event handlers as you like and has the option to wire any of them to the event you want to handle. And unless you "wire" the event to its event handler, the application may not run as expected. Please note that Access will automatically "wire" the event handlers you've written if you used the "build" button next to each event property. And as was mentioned in the UtterAccess thread, you can also go straight to the VBA Editor window and write a procedure based on an Access event template, and Access will automatically wire that event handler to the appropriate event based on the template you used.

See the UtterAccess discussion that started it all.

Original post date: July 5, 2013